Control Panel Explained: i-mop XL & XXL
Let’s get cleaning!
The revolutionary i-mop XL and XXL mopping machines feature a very simple control panel system for easy user training and operation. Aside from its manoeuvrability and cleaning power, the i-mop is well regarded for its ease of use and ergonomics.
This article will explain each i-mop control panel setting with examples of where the setting may be most suitable to use. An explanation video can be viewed here which explains the same settings in a condensed format.
What if I use an i-mop Lite? Don’t worry! View the i-mop Lite Control Panel Explained article here.
Getting Started…
The i-mop XL and XXL use a dial-based control panel interface that simply turns left or right to activate a setting. When a cleaning setting is chosen, the operator places their hands on the control handles to activate the machine. This activation occurs from holding the blue levers that are positioned directly in front of the control handles.
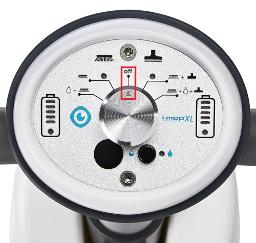
When the i-mop is not in operation, the triangle on the dial should always be pointing up facing ‘Off’.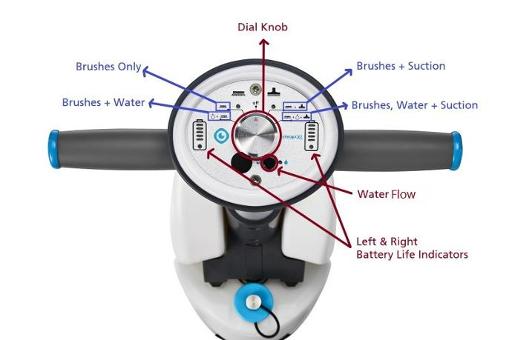
Setting 1: Brushes + Water
To activate, turn the dial two positions to the left.
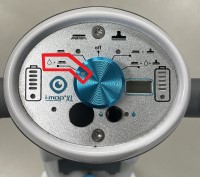
The scrubbing brushes or pads will rotate and water will be released on the floor.
This setting is a great option for a standard clean. The brushes will use the dispensed water as it scrubs, creating a lather on the floor. Ensuring the correct dosage is added to the solution tank will ensure the lather is not too thick when cleaning. As the suction vacuum is not activated using this setting, the water solution will remain on the floor during the cleaning process.
Tip when you first activate the i-mop using this setting, hold the i-mop stationary for a couple of seconds to allow the water a chance to release on the floor. Scrubbing a floor with no water (i.e ‘dry’ scrubbing) can potentially damage sensitive floor types.
The advantage of the Brushes + Water setting is it increases the dwell time of the cleaning solution on the floor, giving it extra time to react with the dirt and other impurities. The operator can also scrub the desired area multiple times prior to activating the vacuum setting and drying the floor. Better cleaning results can be achieved with this setting.
Tip optional splash guards (XL and XXL) can be installed to prevent water flickering when using this setting.
Tip optional Scrub bracket (XL and XXL) can be installed to raise squeegee assembly from contacting the floor when not in use.
Setting 2: Brushes Only
To activate, turn the dial one position to the left.
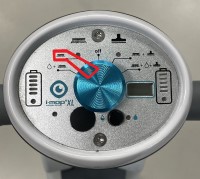
The scrubbing brushes or pads will rotate on the floor.
This setting is very useful for double scrub cleaning where an operator has already applied water to the floor using the Brush + Water setting and would like to continue scrubbing without excess water. Usually, in this instance, the operator will let the water dwell on the floor for a couple of minutes and proceed to clean the area again with the Brushes Only setting.
Tip it is highly discouraged to use the Brushes Only setting if there is no water already on the floor. Floor and grout damage can occur.
Tip optional Scrub bracket (XL and XXL) can be installed to raise squeegee assembly from contacting the floor when not in use.
The advantage of the Brushes Only setting is that it provides an opportunity to double scrub for deeper cleaning. By scrubbing once with water being released, and scrubbing a second time with water already on the floor is one of the most thorough cleaning techniques an operator can do.
Setting 3: Brushes, Water and Suction
To activate, turn the dial two positions to the right.
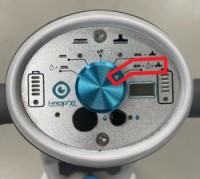
The scrubbing brushes or pads will rotate, water will be dispensed and the vacuum squeegee assembly will dry the floor.
This setting is the perfect all-in-one cleaning choice, allowing users to scrub and dry the floors in a single pass. This setting is excellent for maintaining a floor at the most basic level and is highly convenient for quick cleaning requirements. Keep in mind the floors may not be 100% dry using this setting so slipping caution is still necessary.
Tip filling up the solution tank with warm water will help the floors dry faster. Avoid hot temperatures.
Please note the suction setting should only be used to collect water, it is not a dry vacuum cleaner setting and is not suitable for collecting dust or debris.
The advantage of the brushes, water and suction setting is it allows anyone to still achieve a great cleaning result without spending too much time scrubbing the floors. It is also fantastic for spot cleaning purposes such as cleaning a spillage or mark.
Setting 4: Brushes + Suction
To activate, turn the dial one position to the right.
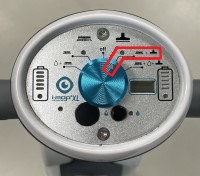
The scrubbing brushes or pads will rotate and the vacuum squeegee assembly will collect water and dry the floor.
This setting complements the Brushes + Water or Brushes Only setting as it will allow the operator to pick up any dirty water on the floor without releasing more water at the same time.
Tip it is highly discouraged to use the Brushes Only setting if there is no water already on the floor. Floor and grout damage can occur.
The advantage of the brushes and suction setting is it reduces wastage of the solution tank water when collecting water already on the floor, increasing cleaning efficiency and saving resources. Just like the other suction setting, it enables the operator to double scrub and collect the dirty water later.
Please note the suction setting is not a dry vacuum cleaner setting and is not suitable for collecting dust or debris.
Other i-mop XL/XXL Control Panel Settings
Water Booster
i-mop XL and XXL Basic, Plus and Pro models feature a black button with a water symbol on the control panel which allows the operator to select between low and high water flow settings. The purpose of this is to provide the operator with the ability to control the desired amount of water/cleaning solution required for either the floor type or level of soiling.
Tip use more water for highly soiled areas that require increased cleaning solution for more aggressive cleaning.
Hour Meter
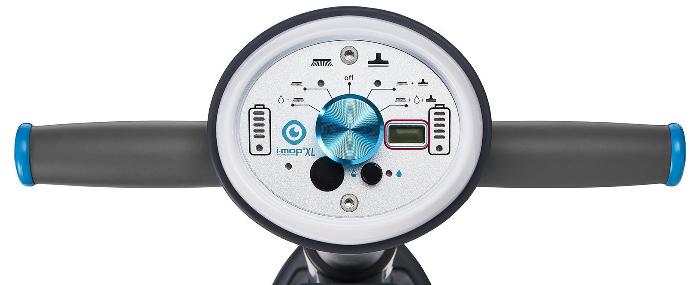
If you own a Plus model, operators can keep track of the running hours of the machine through the LCD screen on the right side of the control panel. The hour meter turns on when the brush motor is engaged (as it is running) - it will not display when the machine is simply turned on, without powering the brush motors.
Emergency Switch Off
i-mop XL Plus and Pro models feature a small light on the left of the control panel which flashes orange if impact occurs to the machine during operation. The machine will stop cleaning, flash orange and make a beeping noise to alert the operator. The i-mop simply needs to be turned off and turned back on again to reset.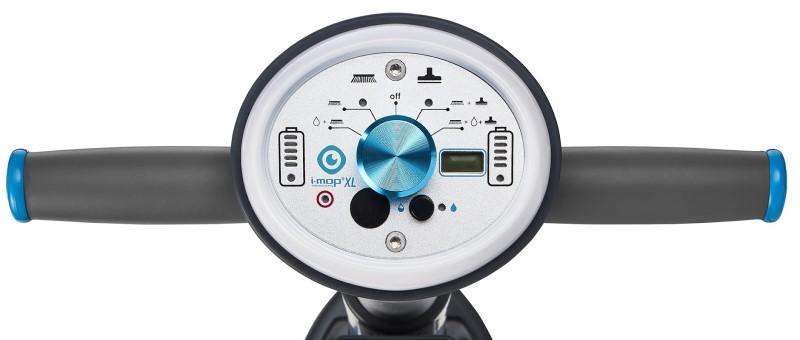
Conclusion
The i-mop XL and XXL Control Panel is a very simple yet highly effective cleaning machine for operators to use and adapt to. The practice of using different cleaning settings will allow operators to determine the best cleaning practice for their floors and will guarantee a more successful cleaning session.
If you still have questions regarding your i-mop and the control panel, please speak to one of Capital Equipment Hire’s sales representatives who will be more than happy to assist you.